The introduction of jbpm-console
- Workbench data and system properties
- A quick start of workbench usage
- Clone repository to local Disk
Workbench data and system properties
Accessing http://localhost:8080/jbpm-console will go into the workbench, The workbench stores its data, by default in the directory $WORKING_DIRECTORY/.niogit, for example, wildfly-10.0.0.Final/.niogit, but this can overwrite via -Dorg.uberfire.nio.git.dir.
System properties
- org.uberfire.nio.git.dir - Location of the directory .niogit. Default: working directory
- org.uberfire.nio.git.daemon.enabled - Enables/disables git daemon. Default: true
- org.uberfire.nio.git.daemon.host - If git daemon enabled, uses this property as local host identifier. Default: localhost
- org.uberfire.nio.git.daemon.port - If git daemon enabled, uses this property as port number. Default: 9418
- org.uberfire.nio.git.ssh.enabled - Enables/disables ssh daemon. Default: true
- org.uberfire.nio.git.ssh.host - If ssh daemon enabled, uses this property as local host identifier. Default: localhost
- org.uberfire.nio.git.ssh.port - If ssh daemon enabled, uses this property as port number. Default: 8001
- org.uberfire.nio.git.ssh.cert.dir - Location of the directory .security where local certificates will be stored. Default: working directory
- org.uberfire.nio.git.hooks - Location of the directory that contains Git hook scripts that are installed into each repository created (or cloned) in the Workbench. Default: N/A
- org.uberfire.nio.git.ssh.passphrase - Passphrase to access your Operating Systems public keystore when cloning git repositories with scp style URLs; e.g. git@github.com:user/repository.git.
- org.uberfire.metadata.index.dir - Place where Lucene .index folder will be stored. Default: working directory
- org.uberfire.cluster.id - Name of the helix cluster, for example: kie-cluster
- org.uberfire.cluster.zk - Connection string to zookeeper. This is of the form host1:port1,host2:port2,host3:port3, for example: localhost:2188
- org.uberfire.cluster.local.id - Unique id of the helix cluster node, note that ‘:’ is replaced with ‘_’, for example: node1_12345
- org.uberfire.cluster.vfs.lock - Name of the resource defined on helix cluster, for example: kie-vfs
- org.uberfire.cluster.autostart - Delays VFS clustering until the application is fully initialized to avoid conflicts when all cluster members create local clones. Default: false
- org.uberfire.sys.repo.monitor.disabled - Disable configuration monitor (do not disable unless you know what you’re doing). Default: false
- org.uberfire.secure.key - Secret password used by password encryption. Default: org.uberfire.admin
- org.uberfire.secure.alg - Crypto algorithm used by password encryption. Default: PBEWithMD5AndDES
- org.uberfire.domain - security-domain name used by uberfire. Default: ApplicationRealm
- org.guvnor.m2repo.dir - Place where Maven repository folder will be stored. Default: working-directory/repositories/kie
- org.guvnor.project.gav.check.disabled - Disable GAV checks. Default: false
- org.kie.example.repositories - Folder from where demo repositories will be cloned. The demo repositories need to have been obtained and placed in this folder. Demo repositories can be obtained from the kie-wb-6.2.0-SNAPSHOT-example-repositories.zip artifact. This System Property takes precedence over org.kie.demo and org.kie.example. Default: Not used.
- org.kie.demo - Enables external clone of a demo application from GitHub. This System Property takes precedence over org.kie.example. Default: true
- org.kie.example - Enables example structure composed by Repository, Organization Unit and Project. Default: false
- org.kie.build.disable-project-explorer - Disable automatic build of selected Project in Project Explorer. Default: false
A quick start of workbench usage
1. Login workbench
http://http://localhost:8080/jbpm-console
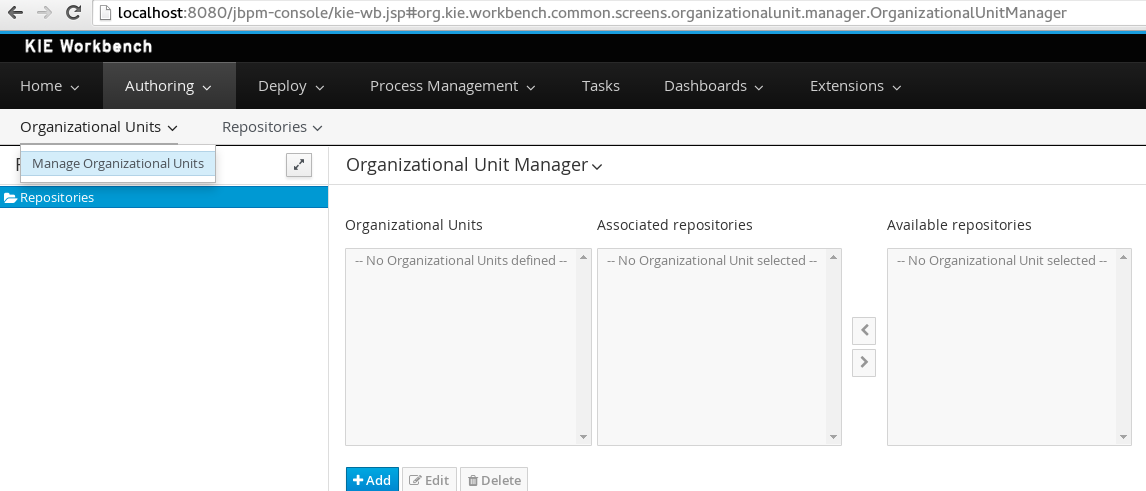
2. Create a Organization Unit
Authoring -> Administration -> Organizational Units -> Manage Organizational Units
Click the blue Add button, in the popped up window, enter the Name, Default Group ID, Owner:

Click the blue Ok button to finish add new Organizational Unit.
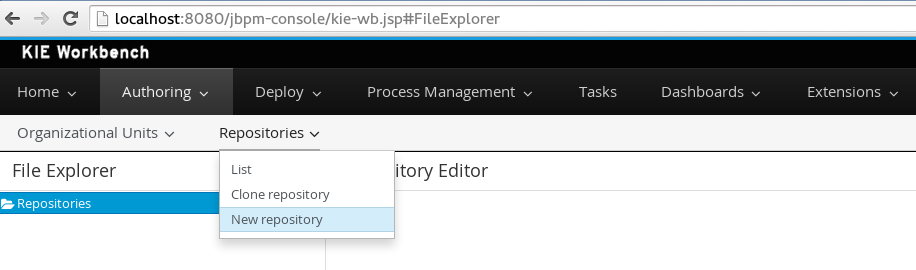
3. Add a repository
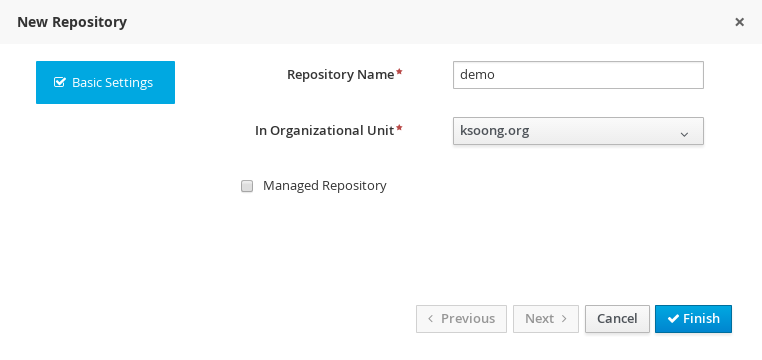
Authoring -> Administration -> Repositories -> New repository
In popped up window, enter a Repository Name and select a appropriate Organization Unit, then click the blue Finish button.
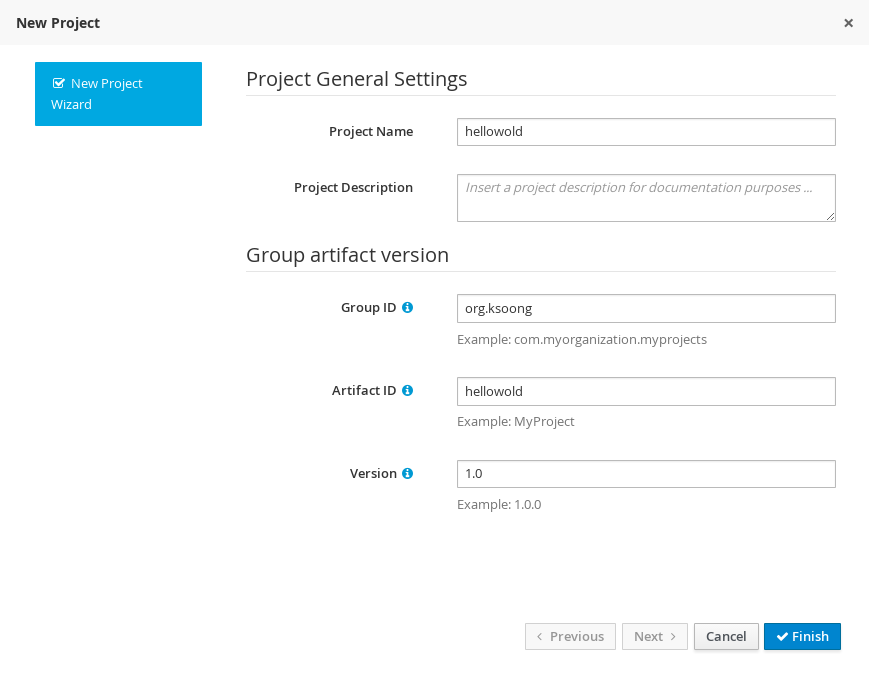
4. Create a project
Authoring -> Project Authoring -> New Item -> Project
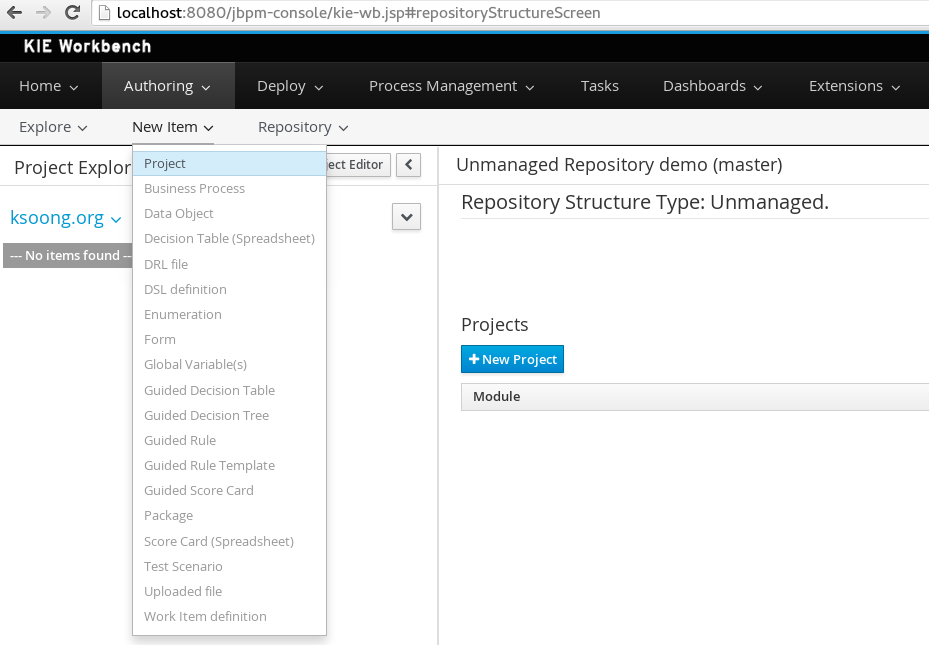
In popped up window, enter the Project Name and Artifact ID, click blue Finish button
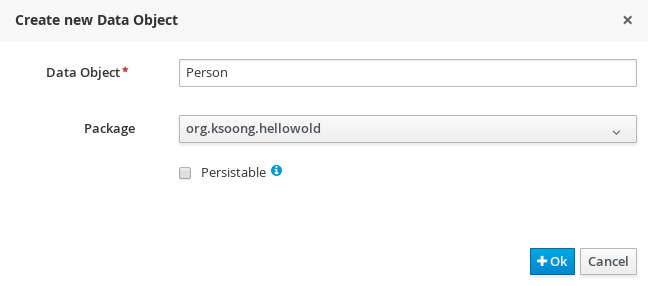
5. Define a Data Model
Authoring -> Project Authoring -> New Item -> Data Object
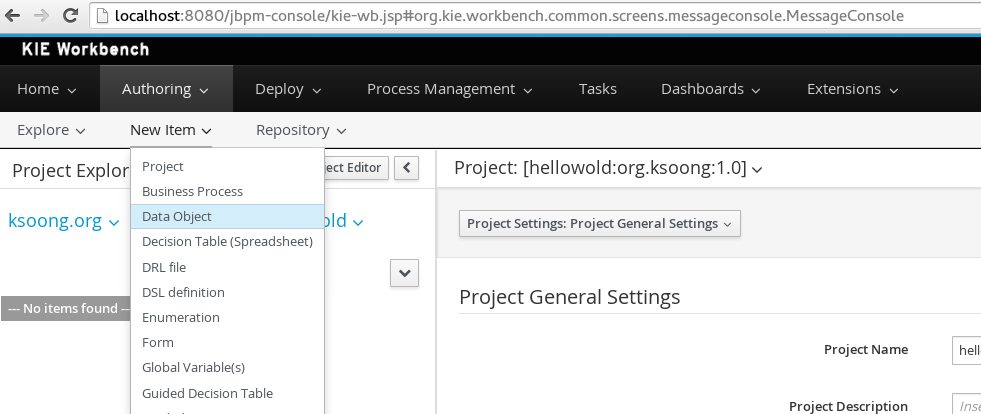
In popped up window, enter a Data Object, select a package, click the blue Ok button
In Data Object Editor, click add field button
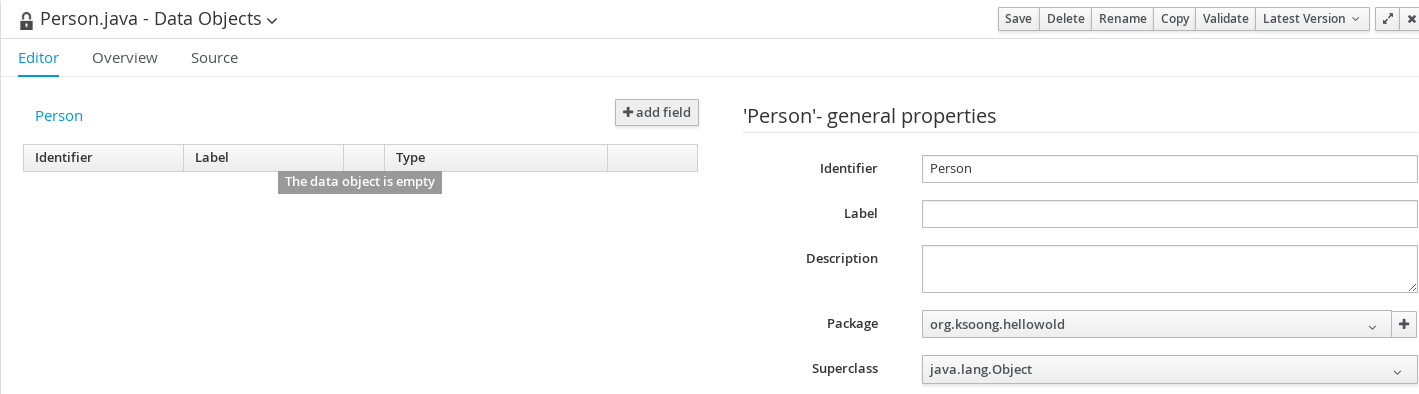
In popped up window, end a Id and Type, either click blue button Create and continue, or Create
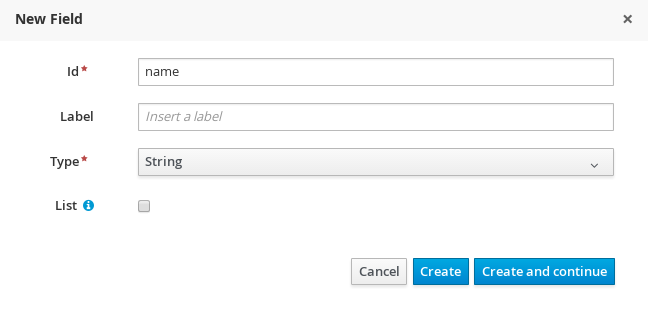
Below is a Data Model named Person, which have 3 fields: id, age, name:

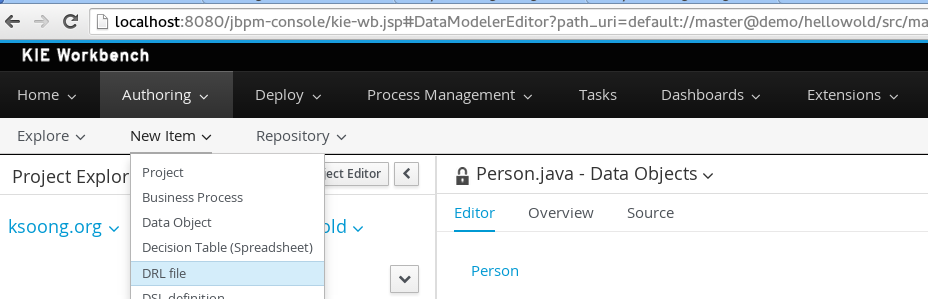
6. Create a Business rules
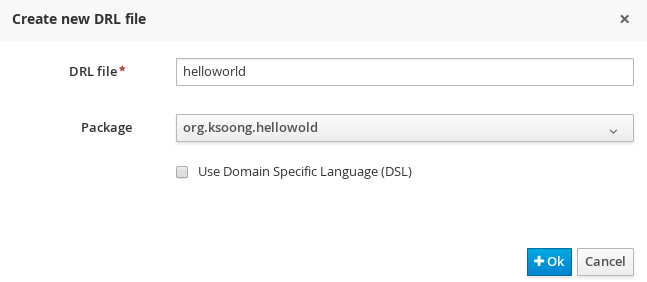
Authoring -> Project Authoring -> New Item -> DRL file
In popped up window, enter the DRL file name, select a appropriate package, click the blue Ok button
In the Project Editor view, edit the drl file with some content
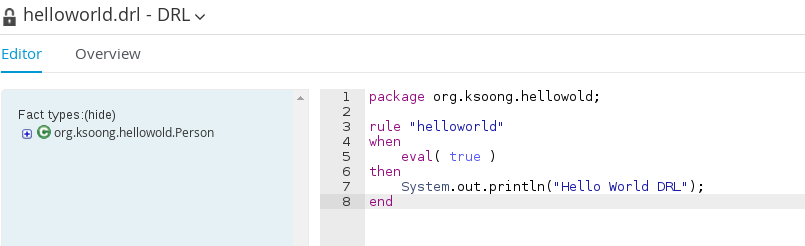
Click the Save button to finish the DRL creation

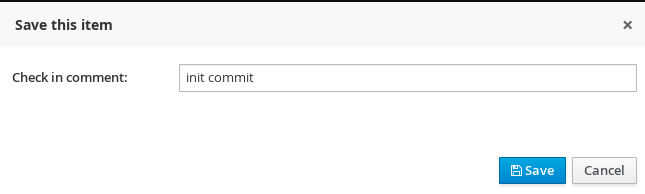
Note that, once click the Save button, a window is pop up, add some git commit comment and click blue Save button
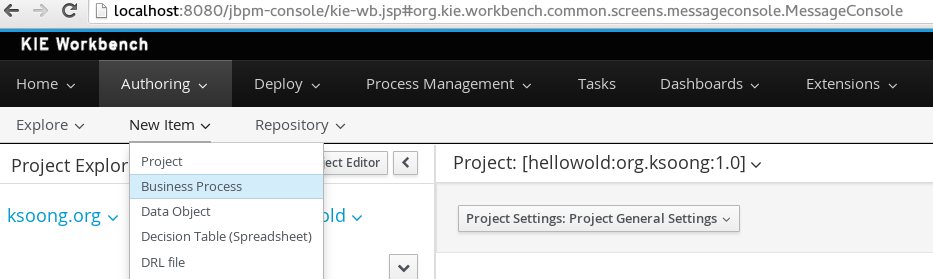
7. Create a Business Process
Authoring -> Project Authoring -> New Item -> Business Process
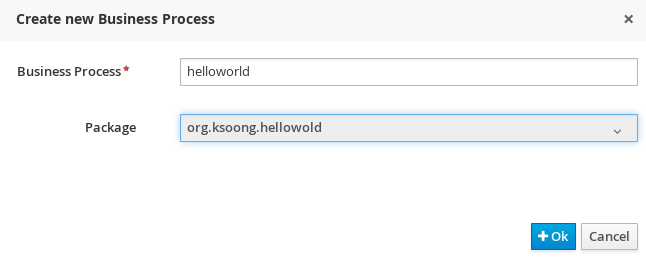
in popped up window, enter the Business Process name, select a appropriate package, click the blue Ok button
A BPMN Designer will pop up
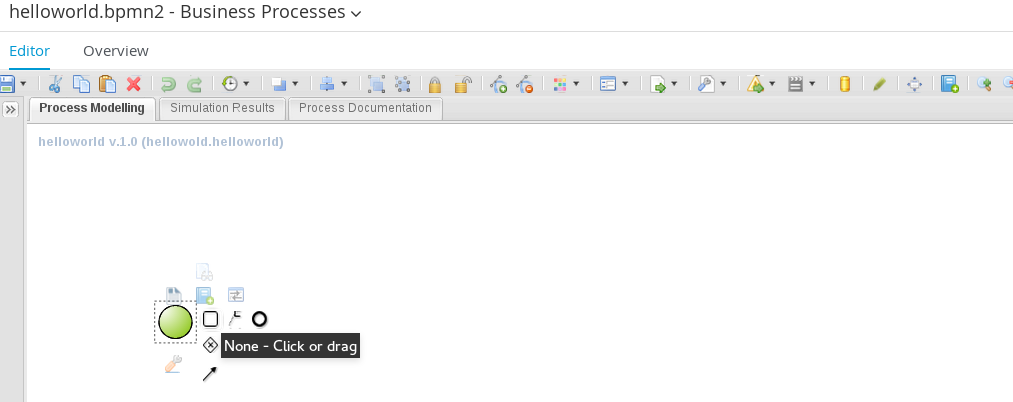
Click or drag to create a one step HelloWorld Script Task Process

Edit Script Task to output ‘Hello World BPM’ to console
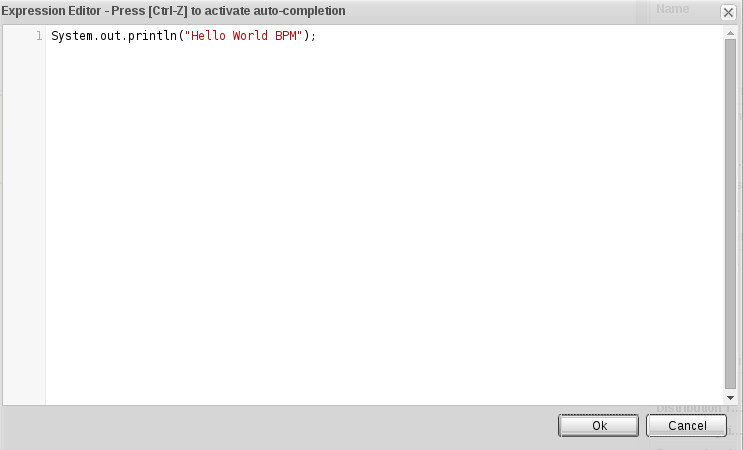
Click Ok button to finish edit Script Task. In Project Editpr, click Save button to finish design process.
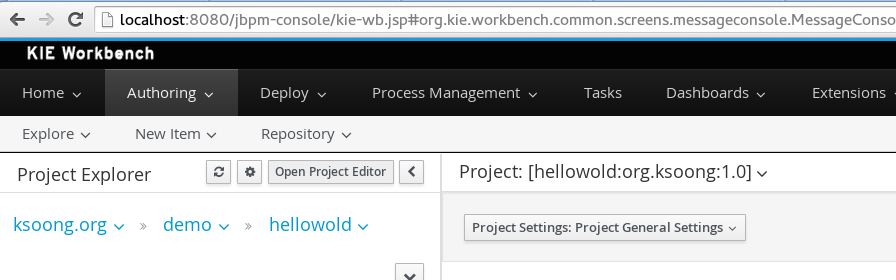
8. Build and Deploy
Authoring -> Project Authoring -> Open Project Editor
In the right of menu bar, Build -> Build & Deploy
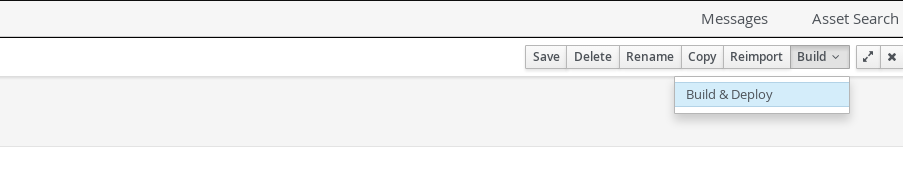
Once Build Success, Deploy -> Process Deployments, you will see the “helloworld” project deployed success

Clone repository to local Disk
In jbpm console, Authoring -> Administration, change into the Repository Editor
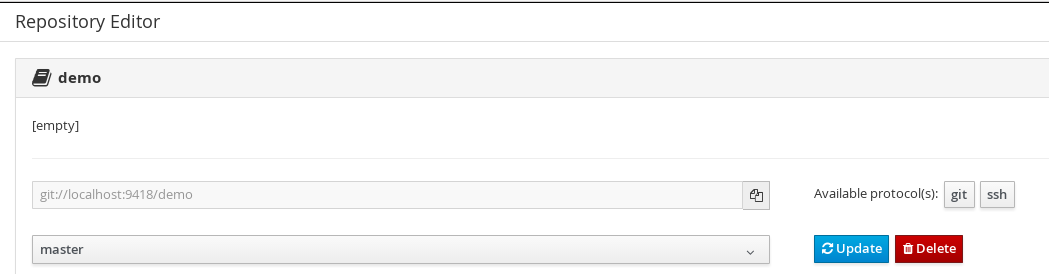
Copy the git url, eg “git://localhost:9418/demo”, clone to local disk
$ git clone git://localhost:9418/demo
$ cd demo/
$ ls hellowold/src/main/resources/org/ksoong/hellowold/
helloworld.bpmn2  helloworld.drl  WorkDefinitions.wid
$ ls hellowold/src/main/java/org/ksoong/hellowold/
Person.java